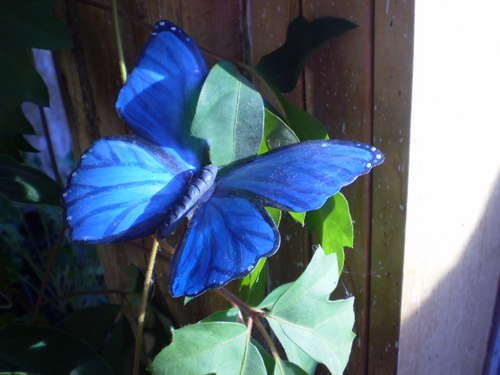
6 Steps To A Beautiful Handmade Butterfly
Not sure what to do with those empty plastic soda bottles? Transform them into beautiful butterflies. This project is both fun and eco-friendly.
 What you need:
- Old plastic soda bottles
- Sharp scissors
- Sandpaper
- Paper butterfly images to trace
- Black permanent marker
- Push pins
- Piece of wood
- Acrylic paint
- Fine paintbrushes
- Mica-based powder
- Black polymer clay
- Black wire
- Small black seed beads
- Spray varnish
- Epoxy glue
Step 1:
Prepare the bottle
- Wash off the label by soaking the plastic bottle in some warm water and dish detergent. Pick off leftover bits of the label, but don't worry about any glue that remains.
- Cut off the curved top and bottom of the bottle so that only a straight plastic cylinder remains.
- Cut a straight edge through the gluey part of the bottle to create a plastic rectangle.
- In a circular motion, sand the outside of the plastic rectangle so the paint can adhere to it. Your plastic should appear frosted or matte.
Step 2:
Pick a butterfly
- Google butterfly images or find some in a magazine.
- Print and/or cut out your favorites and, using a permanent marker, trace the outline onto your plastic.
- Make sure the tips of the wings are parallel to the top of the plastic so you can fold it later.
- Pin your plastic to the wood (but avoid pushing pins into your traced butterfly shapes). Use enough pins to make sure the plastic lies flat.
Step 3:
Paint the wings
- Start with a white or light-color base layer to block some light and make a better surface for the next paint layer. Brush from the center out, and stay inside the lines. Let it dry.
- Your next paint layer is the background layer and features the color of your butterfly. (If your butterfly has two colors, use the lighter color for this step.)
Step 4:
Add details
- Use a fine-tip paintbrush for veins, dots and other realistic butterfly details. Refer often to your butterfly photo. Allow to dry.
- With a clean damp paintbrush, add mica powder to create a realistic sheen on the wings.
Step 5:
Make butterfly bodies
- Use clay to form bodies for your butterflies.
- Cut short lengths of wire to create antennae and press into clay.
- Add black seed beads for eyes.
- Bake your clay bodies as instructed on the package.
Step 6:
Cut, assemble and finish
- Cut out the butterfly wings.
- Spray the wings (but not the bodies!) with a varnishing spray.
- Use a strong glue or epoxy to attach the wings to the body. And you're done!